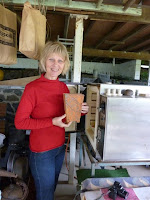
Great results from the glazing workshop we had on Friday....
 Unloading from the kiln...above; Lidwina with her piece and below James...
Pictures; close-ups and detail of the pieces....
Lidwina's Vessel; the stipple effect is evident and gives great variation to the glaze and overall finish of the piece...

...her carving of sharp lines are highlighted by the oxide applied underneath the glaze. Perfectly excuted Vessel, for her first attempt at clay and glazing, top marks...well done, Lidwina!
James' Urn; James has training in Ceramics and is evident with his even application of the glaze

...his understanding for the oxide wash underneath has worked really well on his carving and relief work; the face in the centre of the Urn. Great stuff, James!

CHROME RED GLAZE
(Oxidation only)
Frit 4364 ………………….. 500gm
Lithium Carbonate…….. 350gm
Ball Clay…………………… 150gm
Chrome Oxide…………… 20gm Tin Oxide………………….. 15gm
A Matt Red/Orange dry glaze. Red fired at 750*, rusty Orange at 850*, and Green to Rust at 1060* - 1120*. Being a dry glaze no sieving is necessary.
METHOD OF APPLICATION:
OXIDES:
Oxides are used to create interesting effects with the glaze and clay body; in this instance we are using it to enhance the textures under our glaze. A wash of Manganese Dioxide under the glaze can be used to highlight carving and textures in clay, different thickness in application of oxide can increase the dimension in glazed finish, the wash is applied with a brush or sponge left to dry for a few minutes then wiped back with a damp sponge leaving the oxide in the carved areas in the clay. Wash consistency: 1 tblspn Manganese Dioxide to ½ cup of water.
The results after firing are the familiar Jet Black - Gun Metal colour I create in my Rusty Unearthed and Sculptural pieces.
GLAZING:
There are many methods of applying a glaze; spraying, dipping, pouring, brushing etc… In this case we will brush with a stipple method, this is a familiar term used in painting it’s a dabbing action rather than a brush stroke. The other methods mentioned above can be used except the spraying; lithium in the glaze will clog your spray gun and is not desirable.
The first coat is applied randomly over the oxide… at this stage it is not important to cover the whole surface, some areas left free of glaze will allow the oxide to show through adding to the overall effect of the finished piece. Two more coats are applied in the same manner; randomly. An important note with the 2nd & 3rd coat remember where you started so to get an even application, forgetting the starting point can make for an unsightly - blotchy patch once glazed.
FIRING:
In this case we will fire in an electric kiln (for an oxidized atmosphere) to 840* the desired look is for a bright Orange colour with a little tinge of red.

This is a lovely glaze Kim, and you are so generous to be sharing your 'secrets' with other ceramic artists. xoxoxo
ReplyDeleteThanks Noela, I get alot of satisfaction in the act of giving and do believe that sharing is a wonderful thing...
ReplyDelete:^)
Wat a load of information and it all looks great, you must have had a great time. Well done. And thanks for your generosity.
ReplyDeleteHi Kim,really enjoyed learning with you.Your enthusiasm is infectious.You give so much to the student with the information and knowledge you so freely share.I'm very pleased with my piece. Am ready for the next round of glazing alchemy . Thanks Lidwina
ReplyDeleteThanks Lidwina!
ReplyDelete